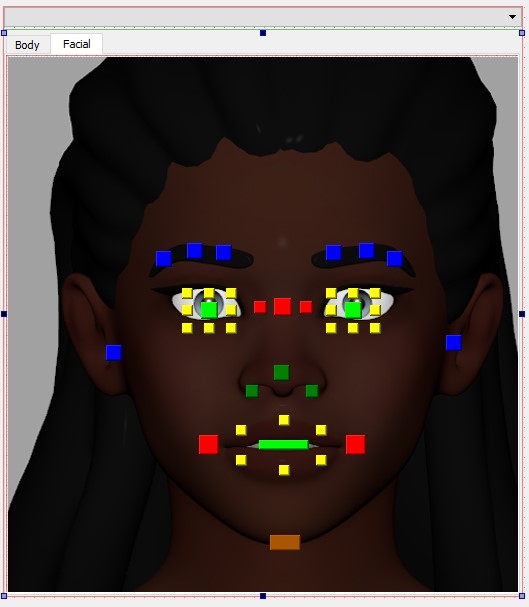
After having seen some pickers I decided to write my own picker and wanted to see what I can accomplish with it. I designed the GUI with QtDesigner. It’s extremely handy and it’s not difficult to get it work on Maya. These are the body and facial tabs.

After the design is finished, you can use the UI converter and XML modules to load the .ui file in Maya. The code below is all you need to pop your UI.
Don’t forget to rename the XXXs in lines 27, 34, 36, 40, 45 according to your project. String in line 36 should be the name of your top object in QtDesigner. Save it to a seperate .py file and make sure both .ui and .py file are in the same folder.

This won’t work with Maya 2022 because pysideuic(UI converter) is removed. Also the code won’t work with Maya 2016 and below because it’s using PySide2.
from PySide2 import QtCore, QtWidgets, QtGui
from maya import cmds
import sys
import os
import logging
import xml.etree.ElementTree as xml
from cStringIO import StringIO
import pyside2uic as pysideuic
import maya.OpenMayaUI as omui
from shiboken2 import wrapInstance

def load_ui_type(uiFile):
	parsed = xml.parse(uiFile)
	widget_class = parsed.find('widget').get('class')
	form_class = parsed.find('class').text
	with open(uiFile, 'r') as f:
		o = StringIO()
		frame = {}
		pysideuic.compileUi(f, o, indent=0)
		pyc = compile(o.getvalue(), '<string>', 'exec')

		exec pyc in frame
		form_class = frame['Ui_%s' % form_class]
		base_class = getattr(QtWidgets, widget_class)
	return form_class, base_class

uiFile = '{}/xxx.ui'.format(os.path.dirname(__file__))
form_class, base_class = load_ui_type(uiFile)

def maya_main_window():
	main_window_ptr = omui.MQtUtil.mainWindow()
	return wrapInstance(long(main_window_ptr), QtWidgets.QWidget)

class XXXClass(form_class, base_class):
	def __init__(self, parent=maya_main_window()):
		self.window_name = 'xxx_window'
		if cmds.window(self.window_name, exists=True):
			cmds.deleteUI(self.window_name)

		super(XXXClass, self).__init__(parent)
		self.setupUi( self )

def runUI():
	global win
	win = XXXClass()
	win.show()

runUI()
I added a dropdown menu at the top, which shows a list you can choose reference from. The list is updated every time when the main window is clicked.
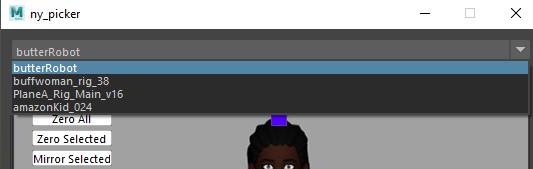
I used pymel.core.listReferences because I couldn’t find a function in cmds module where it only gives you the references in the scene.
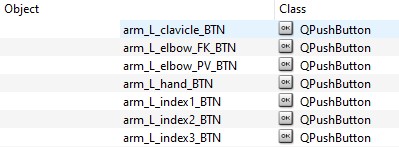
To select the controls in the scene, first there is a keyboard check to decide if selected item is gonna add to or remove from the current selection. I can identify which button is pressed in the UI with sender(). After getting the name of the PySide2 object, I change the “_BTN” suffix to “_CTRL” and select it in the viewport using cmds.select. Undo also works which is cool.
def select_item(self):
	self.check_keyboard()
	self.get_namespace()
	sender = self.sender()
	senderObj = sender.objectName()
	renamed = senderObj.replace('BTN', 'CTRL')
	cmds.select(refName + renamed, add=shift, deselect=ctrl)
And there are few methods for IK/FK matching and connecting the buttons. That’s all!
